Are Leer Truck Caps Removable? Complete Removal Guide & Tips
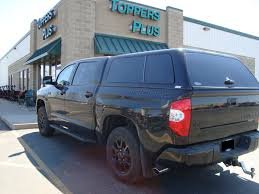
Z Series Aluminum Truck Cap
Premium aluminum construction truck cap featuring sleek aerodynamic design and removable configuration. Built with industry-leading durability standards and precision engineering for maximum functionality and easy maintenance access.
Key Features:
- Lightweight aluminum construction
- Aerodynamic profile design
- Quick-release clamp system
- Weather-sealed gaskets
- Integrated LED lighting
- Multiple window configurations
- Scratch-resistant finish
- Reinforced mounting points
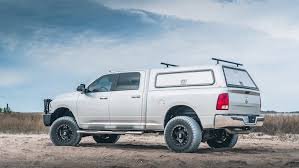
CX Series Commercial Truck Cap
Heavy-duty commercial grade truck cap designed for demanding work environments. Features robust construction with user-friendly removal system for versatile truck bed access and seasonal storage convenience.
Key Features:
- Commercial-grade durability
- Reinforced steel framework
- Easy removal mechanism
- Professional appearance
- Multiple access points
- Weather protection system
- Heavy-duty hinges
Are Leer Truck Caps Removable? Understanding the Design
Yes, Leer truck caps are designed to be removable, making them one of the most versatile truck accessories on the market. The question “are leer truck caps removable” comes up frequently among truck owners who need seasonal flexibility or occasional full bed access.
Leer manufactures their truck caps with removal in mind, incorporating specific mounting systems that allow for safe disassembly when needed. The removability feature distinguishes quality caps from permanent installations, giving truck owners the freedom to adapt their vehicle’s functionality throughout the year.
Most Leer models use clamp-based mounting systems that secure the cap to the truck bed rails without permanent modification to your vehicle. This design philosophy ensures that are leer truck caps removable while maintaining structural integrity and weather sealing during normal use.
Understanding Leer’s Mounting System
Leer truck caps utilize a sophisticated clamping mechanism that distributes weight evenly across the truck bed rails. This system consists of adjustable clamps positioned at strategic points around the cap’s perimeter, typically every 12-18 inches depending on the truck model.
The clamps feature rubber gaskets that create weatherproof seals while preventing damage to your truck’s paint and bed rails. When properly installed, these clamps provide exceptional holding power that keeps the cap secure during highway driving and adverse weather conditions.
Step-by-Step Leer Truck Cap Removal Process
Removing a Leer truck cap requires careful preparation and the right approach to ensure safety and prevent damage. Before beginning the removal process, gather necessary tools including socket wrenches, helpers, and protective materials for storage.
Start by clearing the truck bed completely and ensuring you have adequate workspace around your vehicle. The removal process typically takes 30-45 minutes with two people, though first-time removals may require additional time to familiarize yourself with your specific model’s mounting system.
Preparation and Safety Steps
Position your truck on level ground away from overhead obstacles like garage doors or tree branches. Recruit at least one helper, as most Leer truck caps weigh between 150-200 pounds and require coordinated lifting to prevent injury or damage.
Remove any accessories attached to the cap such as ladder racks, light bars, or bike mounts before beginning the removal process. Disconnect any electrical connections for interior lighting or third brake lights, taking photos of wire configurations for easier reinstallation.
Clamp Release and Lifting Procedure
Locate all mounting clamps around the truck cap’s perimeter and begin loosening them in a systematic pattern. Start from one corner and work your way around, loosening each clamp partially before making a second pass to fully release them.
Once all clamps are released, position helpers at opposite corners of the cap for balanced lifting. Lift straight up with steady, coordinated movement, avoiding any twisting or tilting that could damage the cap or truck bed. Many truck owners find that easy install truck caps with modern mounting systems make this process significantly more manageable.
Storage and Reinstallation Tips for Leer Caps
Proper storage of your removed Leer truck cap protects your investment and ensures easy reinstallation when needed. The question of are leer truck caps removable becomes more relevant when you have a solid storage and reinstallation plan.
Store your cap in a clean, dry area where it won’t be subject to extreme temperature fluctuations or potential impact damage. Many owners use furniture pads or moving blankets to protect the cap’s finish during storage periods.
Creating an Ideal Storage Environment
Position the cap on padded sawhorses or a purpose-built storage rack that supports the weight evenly across the frame. Avoid storing the cap directly on concrete floors, which can cause moisture damage and finish deterioration over time.
Cover the stored cap with a breathable tarp or car cover to prevent dust accumulation while allowing air circulation. Check periodically for any signs of moisture accumulation or pest intrusion, especially during extended storage periods.
Reinstallation Best Practices
Before reinstalling your Leer truck cap, inspect all mounting clamps and gaskets for wear or damage. Clean the truck bed rails thoroughly and check for any corrosion or damage that occurred during the cap-free period.
Reinstallation follows the reverse process of removal, with careful attention to proper alignment and even clamp tightening. The fact that are leer truck caps removable makes seasonal transitions smoother, but proper technique ensures optimal performance after reinstallation.
Common Challenges and Solutions When Removing Leer Caps
Even though are leer truck caps removable by design, certain challenges can arise during the removal process that require specific solutions and techniques. Understanding these potential issues helps truck owners prepare effectively and avoid costly mistakes.
Stuck or corroded clamps represent the most common challenge when removing Leer truck caps, especially on older installations or vehicles exposed to harsh weather conditions. Salt exposure, in particular, can cause clamp mechanisms to seize over time.
Dealing with Seized Mounting Hardware
When clamps won’t release easily, apply penetrating oil and allow time for the lubricant to work before attempting removal. Use steady pressure rather than impact force, which can damage the clamp mechanism or truck bed rails.
For severely corroded clamps, consider professional assistance rather than risking damage to your truck or cap. Replacement clamps are available from Leer dealers and can often be upgraded to newer, more corrosion-resistant designs during reinstallation.
Weight and Handling Difficulties
The substantial weight of Leer truck caps creates handling challenges that require proper planning and technique. Never attempt removal alone, regardless of your physical capabilities, as the awkward shape and weight distribution make solo removal extremely dangerous.
Consider using mechanical lifting aids like engine hoists or furniture dollies for caps that will be removed frequently. These tools make the process safer and reduce the physical demands on helpers. When comparing different brands and models, understanding that ARE vs Leer truck caps both offer removable designs can help inform your decision-making process.
Maintenance During Cap Removal and Storage
The periods when are leer truck caps removable provide excellent opportunities for maintenance that’s impossible when the cap remains installed. Take advantage of removal times to perform thorough inspections and necessary repairs or improvements.
Inspect all gaskets and seals for cracking, hardening, or compression set that could compromise weatherproofing. Replace any damaged seals before reinstallation to maintain optimal protection for your truck bed and cargo.
Cleaning and Inspection Procedures
Clean both the truck cap and truck bed thoroughly during removal periods, paying special attention to areas that are normally inaccessible. Check for any signs of water intrusion, rust formation, or structural damage that requires attention.
Lubricate all moving parts including hinges, handles, and locking mechanisms using appropriate marine-grade lubricants that resist moisture and corrosion. This maintenance extends component life and ensures smooth operation after reinstallation.
Upgrading Opportunities
Removal periods offer ideal timing for upgrades or modifications that are difficult with the cap installed. Consider adding bed liner coatings, installing tie-down points, or upgrading electrical systems while access is unrestricted.
Document any modifications or repairs with photos and notes for future reference. This documentation proves valuable for warranty claims and helps maintain consistent maintenance schedules as your truck ages.
Professional vs DIY Removal: Making the Right Choice
While are leer truck caps removable as a DIY project, certain situations warrant professional assistance to ensure safety and prevent damage. Understanding when to tackle removal yourself versus hiring professionals helps protect your investment and personal safety.
Professional removal services have specialized equipment and experience handling various truck cap models and potential complications. They carry insurance coverage for any damage that might occur during removal, providing peace of mind for expensive cap models.
When to Choose Professional Removal
Consider professional removal for caps with complex electrical systems, custom modifications, or when you lack adequate help or workspace. Professional services often include proper storage recommendations and can schedule reinstallation at your convenience.
Trucks with lift kits, custom bed modifications, or accessibility challenges may require professional expertise to ensure safe removal without damage. The additional cost often proves worthwhile compared to potential repair expenses from improper removal attempts.
DIY Removal Advantages
DIY removal offers cost savings and the satisfaction of maintaining your own equipment while building familiarity with your truck cap’s systems. This knowledge proves valuable for future removals and helps you identify potential issues before they become serious problems.
The flexibility of DIY removal allows you to work on your own schedule and take extra time for careful handling and inspection. Many truck owners find that understanding their cap’s removal process enhances overall ownership satisfaction and confidence.
Frequently Asked Questions
Making the Most of Your Removable Leer Truck Cap
Understanding that are leer truck caps removable opens up numerous possibilities for truck owners who value versatility and functionality. The ability to remove your cap seasonally or for specific hauling needs adds significant value to your truck investment while maintaining the security and weather protection benefits during normal use.
Successful Leer truck cap removal depends on proper preparation, appropriate help, and following established procedures that prioritize safety over speed. Whether you choose DIY removal or professional services, understanding the process helps you make informed decisions and maintain your equipment properly throughout its service life.
The removable design of Leer truck caps represents thoughtful engineering that balances security, functionality, and user convenience. By following proper removal and storage procedures, you can enjoy years of reliable service while adapting your truck’s capabilities to meet changing needs and seasonal requirements.
Regular maintenance during removal periods, combined with proper storage and reinstallation techniques, ensures your Leer truck cap continues providing excellent protection and functionality. The investment in quality removal practices pays dividends in extended cap life, maintained appearance, and reliable performance throughout your ownership experience.